Defining a New
Collection
Recollector provides two ways to create a new collection:
1. Create a collection from a template, using a wizard. The wizard will step you through the creation of a new collection, using one of Recollector’s built-in templates. The template specifies which fields will be automatically defined for your collection. You will have the opportunity to add to or modify this initial set of fields. A collection made from a template does not initially contain any data. Data is added subsequently, either by data entry using the customized data input screen that is automatically created for the new collection, or by importing from an Excel spreadsheet or from a tab-delimited or comma-delimited text file.
2. Create a collection from a pre-existing Excel spreadsheet or from a tab-delimited or comma-delimited text file. In this case the set of fields will be derived from the columns found in the spreadsheet or file, and the collection will also be populated with the data from the spreadsheet or file.
This section of the User’s Guide describes the first of these two methods: Creating a collection from a template, using a wizard. To read about the other method, go to the section of the User’s Guide on Creating a Collection from an Excel Spreadsheet or a Text File.
To set up a new collection, pick New Collection from the File menu of a collection. This will bring up the following dialog box:
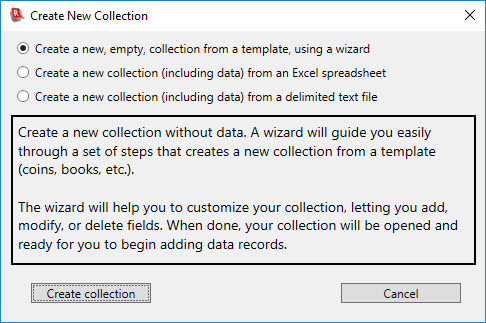
Make sure that the first choice (Create a new, empty, collection from a template, using a wizard) is selected. Click the Create collection button. (If you want to use one of the other two choices – creating a collection, including data, from an Excel spreadsheet or a delimited text file – read the section of the User’s Guide on Creating a Collection from an Excel Spreadsheet or a Text File.)
The Create Collection Wizard will be displayed:
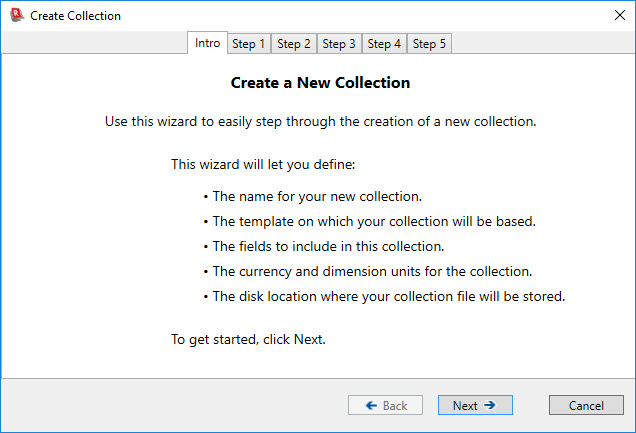
The wizard helps you to create a new collection in five easy steps. The sections below describes the individual steps. Click the Next button to move from step to step. You can use the Back button to return to earlier steps to look at your prior choices or to make changes.
Important note! All of the choices you make while using the wizard are reversible. Even after you have begun to add data to your collection, you will be able to modify the choices that you made earlier when you were using the wizard to create the collection. You will be able to add new fields, modify existing fields, delete unneeded fields, change the collection’s name, and modify the default currency and dimension units. For this reason, do not think, as you make your way through the steps of the wizard, that you need to make exactly the right choices. You will always be able to make changes to your collection later on. So if you find yourself uncertain about which choice to make at some point in the wizard, don’t worry too much and just make your best guess; you will always be able to fix things up later, if necessary.
Step
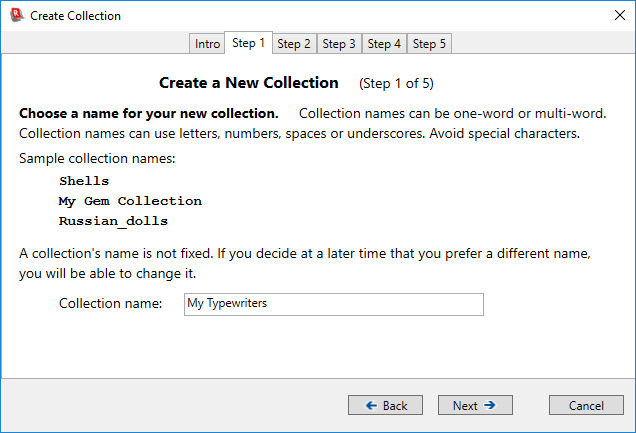
1: Name your new collection
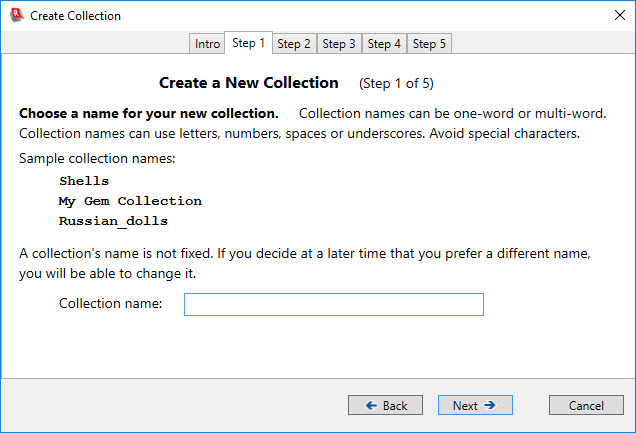
Every collection has a name, usually identifying the nature of the collection. Type in the name you want to give your collection. Collection names can be single-word or multi-word, but the letters in a collection name must consist only of letters, numbers, spaces, and the underscore character. In the images shown in this section of the User’s Guide, the examples will be for a collection of early typewriters, which will be named My Typewriters:
Click the Next button to move on to the next step of the wizard.
Step
2: Choose a template for the collection
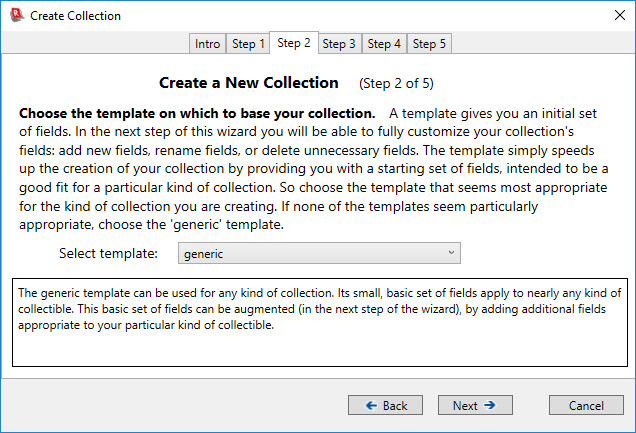
Recollector comes with a set of templates for new collections. The templates provide you with an initial set of fields. (You will be able to make modifications to this initial set in the next step of the wizard.) The program tries to start you off with a set of fields appropriate for the kind of collectibles you will be cataloging. Click on the down-arrow of the drop-down list to see the set of available template names, and choose the template that seems most suited to your collection type. After choosing a new template name from the drop-down list, a description of the particular template is shown. Read the description to see if it fits your collection. If several template names seem possibly appropriate, try selecting each of them and read their descriptions to help you make a choice.
If the kind of collectible you have doesn’t match any of the choices in the drop-down list, choose generic, which will start you off with a simple set of fields that are applicable to almost any kind of collection; you can then add to this initial set during the next step of the wizard.
For our example collection of typewriters, the machines template seems like the best choice:
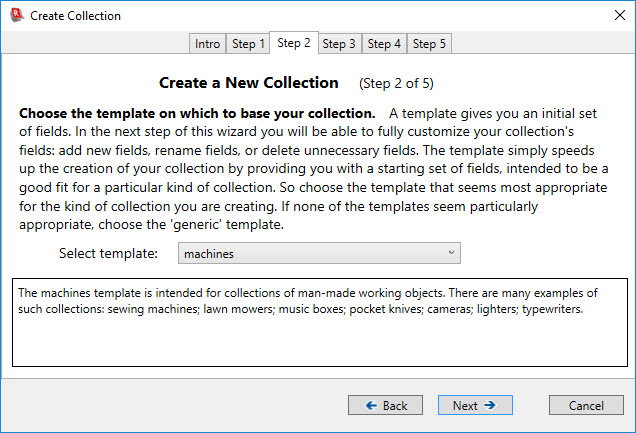
Click Next to proceed to the third step of the wizard:
Step
3: Customize the fields for your collection
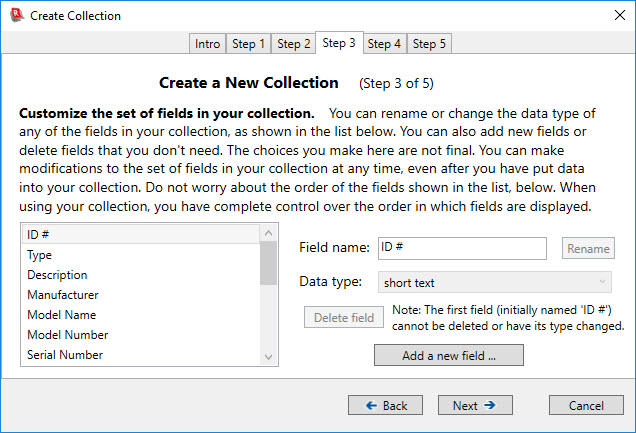
In this step of the wizard, the scrolling list at the left initially shows you the fields that are provided by the template you chose in the previous step. If the set of fields seems inappropriate for your collection, you can always click the Back button to go to the previous step and choose a different template.
Look through the list of fields to see whether you want to make any changes. The following changes can be made:
·
Change
the name of a field: Click on the element in the list whose name you want
to change. Edit the name in the Field
name text-entry box and click the Rename
button. The only restriction on field
names is that you cannot have duplicate names, so the program will not let you
change a field’s name to a name that is already in use by another field.
Special notes on field names:
Ø If a field’s name is enclosed in parentheses, for example: (Images), and the field’s type is image/audio/video, Recollector will hide the field’s name (but not the data) in the Item Details display for a data record. Image fields typically don’t need a field name next to them in order to define what is being shown: The image itself is self-explanatory, and the display of the record is more attractive if the field name for the image is omitted. Use parentheses around the field name to get this hidden-field-name effect. Most of the image-type fields in Recollector’s templates do this: The templates include a field named (Images).
Ø Currency and dimension fields are displayed by Recollector using the currency symbol or dimension abbreviation chosen as the defaults (see the next step of the wizard). However, you can define a custom currency or dimension field that uses non-default units. This is appropriate when, for example, one particular dimension field uses different units than the default units used by other dimension fields. It is also appropriate when you have a currency or dimension field for which you want to specify units that aren’t included in the set of default choices. To provide a currency or dimension field with custom units, specify the custom unit symbol or abbreviation, in parentheses, at the end of the field name. For example: Width (mm.) or Price (¥)
· Change the data type of a field: Click on the element in the list whose type you want to change. Pick the desired type from the Data type drop-down list. There are eight available data types:
Ø short text [For fields that will hold short text values, typically just a word or a phrase.]
Ø one-line text [For fields that will hold longer, but still single-line, texts, such as long phrases or not-too-long sentences.]
Ø multi-line text [For fields that will hold long texts, including longer sentences, multiple sentences or multiple paragraphs.]
Ø currency [For fields that will hold currency values.]
Ø dimension [For fields that will hold size values, such as length, width or height.]
Ø number [For fields that will hold numeric values (other than currencies or dimensions).]
Ø date [For fields that will hold full (e.g. Mar. 22, 1945) or partial (e.g. 1850) dates.]
Ø image/audio/video [For fields that will hold images or audio/video clips.]
Note: The three text data types (short text, one-line text, and multi-line text) are mostly identical. They differ only in the way that text-entry fields are displayed in the data-entry/editing window. Short text fields are displayed as small text-entry boxes; one-line text fields are displayed as full-width text-entry boxes, and multi-line text fields are displayed as full-width, scrollable, multiple-line text-entry boxes. In addition, only short text and one-line text fields can be configured to use a picklist (drop-down list) in the data-entry window.
· Delete a field: Click on the element in the list that you want to delete, and click the Delete field button.
· Add a new field: Click the Add a new field button. A new-field panel will appear. Type in a name for the new field and choose a data type from the drop-down list:
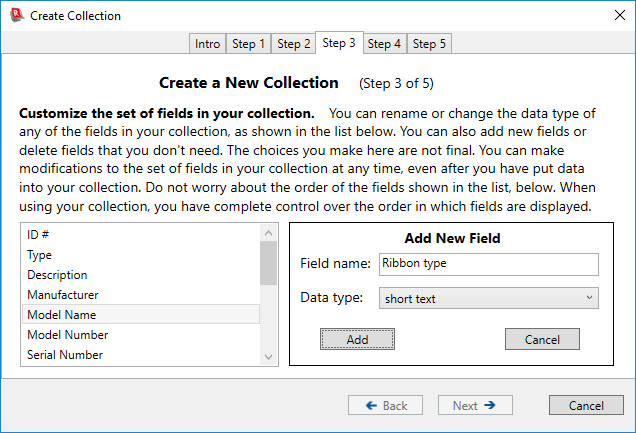
Click Add to add the new field to the list:
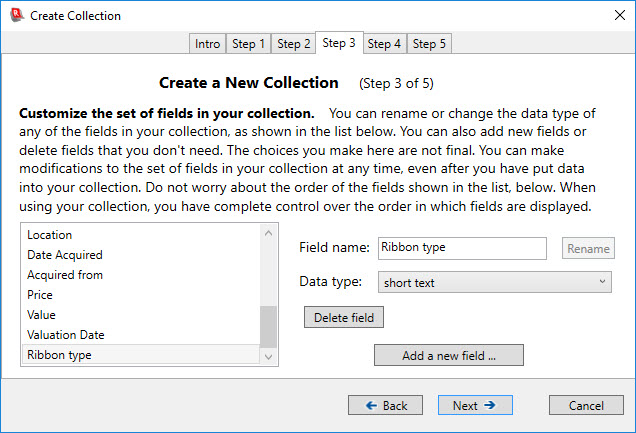
Note that the new field has been added at the bottom of the list. It is important to note that the order of the fields shown in this list does not matter. Once you have created your collection and are working with it (adding and editing data, displaying the collection), you will have complete control over the order in which fields are displayed. The order in which fields are shown here in the wizard has no effect on field order once you are using the collection.
Click Next to proceed to the fourth step of the wizard:
Step
4: Choose default units for currency and dimension fields
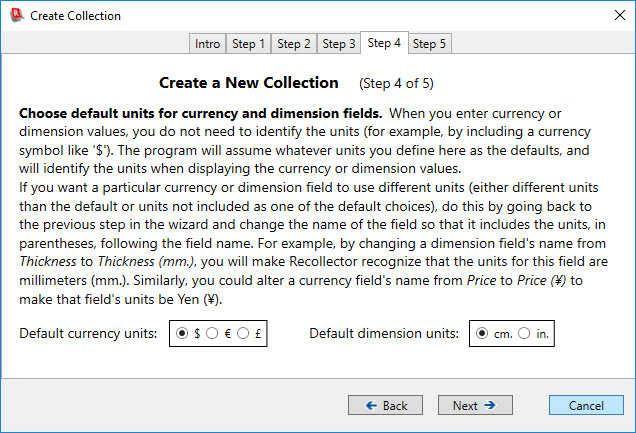
When entering data into your collection for currency and dimension fields, you do not need to include symbols or abbreviations for the units used (and, in fact, you should not include currency symbols as part of the value). For example, if you have a currency field for the price which you paid for an item, you would enter the price as 123 rather than as $123 (if your currency units are dollars). Recollector will assume that your currency and dimension values utilize whichever units you define in this step of the wizard, and Recollector will show the appropriate units symbol or abbreviation when displaying your data.
As described in the notes on this page of the wizard, and as described in the previous section of the User’s Guide (Step 3: Customizing the fields for your collection), you can create individual currency or dimension fields that use a different set of units than those defined as the default. More commonly, however, you will want to use a single currency unit and a single dimension unit throughout, and this step of the wizard lets you define those units.
Click Next to proceed to the last step of the wizard.
Step
5: Choose where to store your collection
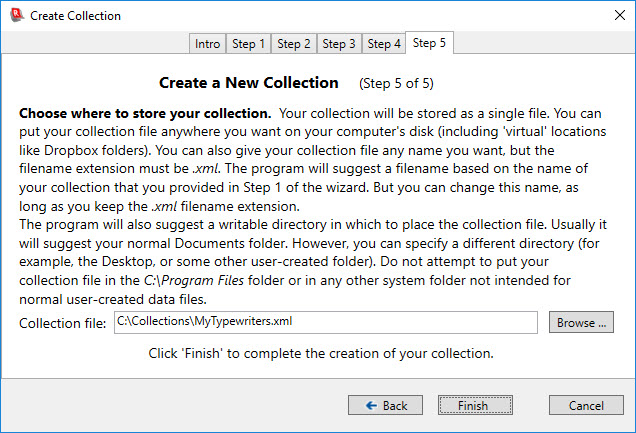
At this point, the wizard is ready to create the underlying data file for your collection. You can choose where to store this data file and what it should be named. The wizard will suggest a location in your computer’s Documents folder and will suggest a name derived from the name of your collection. If you want a different name or location, click the Browse button and use the file-selection dialog that comes up to choose a new name and/or location for your collection file. (In the example shown here, a folder named Collections on the C: drive – this being a folder created by the user expressly for storing their collection data – is supplied as the folder to use for the collection file.) Note: The filename for your collection file must have a filename extension of .xml. Recollector stores collection files in XML format, and such files have .xml as their filename extension. You can change the initial part of the collection’s file name, but you must keep .xml as the filename extension.
Click the Finish button to complete the creation of your new collection. Once the new collection has been saved to disk, Recollector will open the new, empty, collection and will display a “Congratulations” note, including some suggestions for further use and customization of your collection:
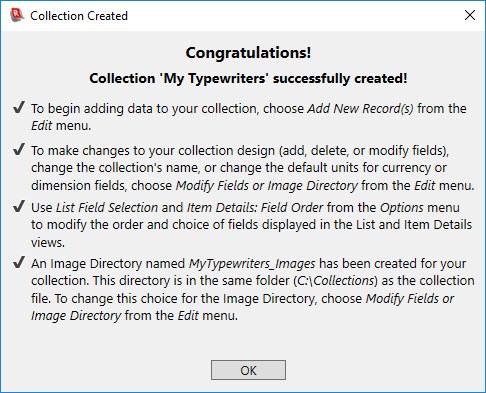
When Recollector created the collection file, it also created a folder to hold your collection’s images. This is referred to as the Image Directory. The folder for the Image Directory was created in the same directory as your collection file. Recollector does not require your collection to use an Image Directory. Your collection may not contain images (in which case an Image Directory is not needed), or you may choose to link to images in a variety of locations on your disk, rather than just in one single directory. But, in general, it is a good idea to have and to use an Image Directory with your Recollector collection. The last section on the Congratulations! Window explains how to modify (or eliminate) the Image Directory specification for your collection. For full information on images (and audio or video clips) and the image directory, see The Image Directory.
If you exit Recollector at this point, the program will remember the location of your collection file. The next time you open Recollector, the program will automatically open and display the same collection.
Back to: Recollector - Home Page