Recollector User’s Guide
Setting User Preferences
Recollector lets you control certain aspects of its behavior via a Preferences dialog. This is accessed via the Preferences choice on the Options menu. The Preferences dialog is a tabbed dialog. Select the tab at the top to access preference choices related to different aspects of the program. Preferences apply to all your collections. So, when you bring up the Preferences dialog from one collection window, all the choices you make will also apply to any other collection window that is open or that is subsequently opened.
Images
The Images tab lets you specify various aspects of Recollector’s handling of images.
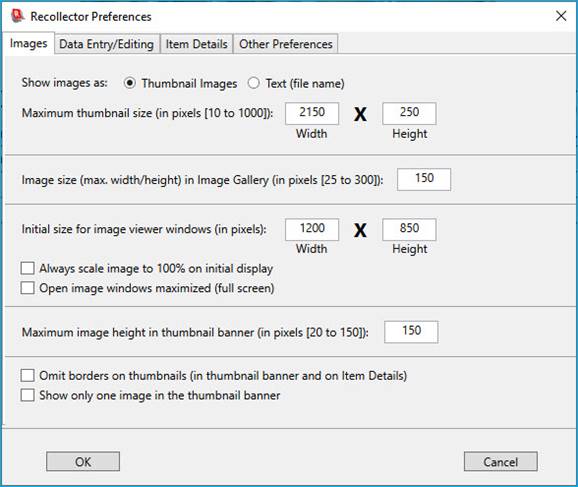
- Show
images as – Normally, in the Item Details view, Recollector displays
image links as thumbnails (except for links to audio or video clips, which
are always displayed textually). However, you can specify that you want
image links to always display as text. (This will cause the program to run
a bit faster, since it will not have to spend time generating thumbnail
images. Also, the Item Details display of your data will be somewhat more
compact, since thumbnail images require more space than text.) Note: If
you have requested to show image links as text, the thumbnail banner of
the List View and the Image Gallery, will always show images (for locally
accessible images), regardless of the setting of this preference.
- Maximum
thumbnail size – Specify the desired maximum size of thumbnails. The
specified dimensions are in device-independent pixels (DPI – 96 to an
inch). The default for both height and width is 150 pixels. Values between
10 and 1000 are allowed. In creating
a thumbnail, for display on the Item Details view, the image will be
scaled so that neither the height nor the width exceeds the specified
maximums. Images whose actual size is less that these limits will be shown
at actual size; they will not be enlarged to reach the maximum-size limits.
- Image
size in Image Gallery – Choose
a maximum size for the thumbnail images displayed in the Image Gallery
view. The specified size (which must be between 25 and 300 pixels), is the
maximum edge size (length or width, whichever is larger) in
device-independent pixels (DPI – 96 to an inch). Specifying smaller sizes will allow the
Image Gallery to display more cells in the window, but less detail will be
visible in a smaller image.
- Initial
size for image viewer windows – Specify the initial size for image
viewer windows. The default size is 600 pixels wide by 450 pixels high. If
your screen resolution is high, you may want the initial size to be
larger. Image windows are resizable, but rather than always having to
manually enlarge each image window, you may just prefer to have these
windows always be larger when initially displayed. The size specified is
in device-independent pixels (DPI
– 96 to an inch). The minimum allowable size in either direction is
200 pixels; the maximum is the pixel width/height of your screen.
- Always
scale image to 100% on initial display – Normally, when the program opens an image window, the displayed
image will be scaled so that it fully fits within the window.
Consequently, in the initial display, the scale slider may be set at 100%
(if the full-size image fully fits in the window), or it may be set at a
lower percentage (90%, 80% ... on down to a minimum of 10%) if the image
size needs to be reduced in order to fit the full image in the displayed
window. If you turn this check box
on, then images are always initially displayed at full size (100%), even
if this results in only part of the image fitting in the displayed window.
- Open
image windows maximized (full screen) – The Initial size for image
viewer windows preference (described above) determines the initial
size of image windows. However, if you turn on this check box, image
windows will always be open maximized, filling the entire screen. Once the
maximized window is open, if you click the Restore down button (at the right end of the window’s title
bar, just to the left of the ‘X’
[close] button), the window will be reduced to the size specified by the Initial size for image viewer windows
preference.
- Maximum
image height in thumbnail banner – In the List View, the optional thumbnail banner, above the list,
has images whose default maximum height is 150 pixels. If the records in
your collection have many images associated with each record, then you
might prefer smaller images in the thumbnail banner, so that all the
images can be viewed at once. To do this, specify a size smaller than 150
for this preference. (Note that even if all the thumbnail images for a record
don’t fit in a single row in the thumbnail banner, the banner will have a
scroll bar at the right, which allows you to scroll the thumbnail banner
in order to view all the images.)
- Omit
borders on thumbnails –
Normally, Recollector puts a blue border around thumbnail images in the
thumbnail banner and in the Item Details display. This is to remind you
that the thumbnail image functions as a hyperlink, which, when clicked on,
will bring up an image window for the full-size image. But if you prefer
to omit the blue border around thumbnail images, turn on this check box.
The images will still operate as hyperlinks, even with the borders
removed.
- Show
only one image in the thumbnail banner – If a record has multiple
images associated with it, normally all those images are displayed in the
thumbnail banner, laid out side-by-side. (If the images do not all fit in
the visible width of the banner, a scroll bar is added at the right-hand
edge of the banner, allowing you to scroll to see thumbnails which may be partially
or fully hidden.) If you turn on this check box, only the first image, for
a record with multiple images, will be shown in the banner. This avoids
the display of multiple thumbnails exceeding the width of the banner, and
it can improve the performance of moving between records in the List View,
since the program will not need to read in as much data from image files.
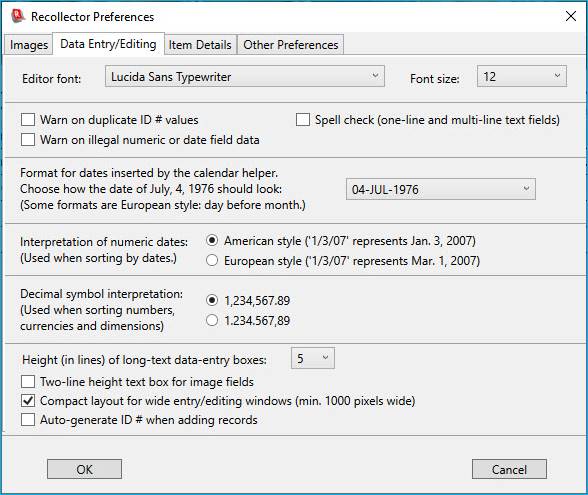
Data Entry/Editing
The Data Entry/Editing tab provides access to choices affecting the behavior of the window used for adding or editing data:
Note: A number of the more commonly used editor preferences are also accessible via the Preferences menu that is available in the data-entry/editing window itself, located at the top of the window.
· Editor font and Font size – You can modify the font and font size used in the data-entry/editing window. Only monospaced fonts are allowed, so the drop-down list of font family names only shows a relatively small number of choices.
· Warn on duplicate ID # values – In most cases, the values in the ID # field of a collection should be unique for each record, with no duplicates. By turning on this check box, you can let the program warn you if you have specified a value in the ID # field that duplicates the value found in another record. The warning will be displayed when, in the data-entry/editing window, you attempt to save the current record. Though usually desirable, ID # uniqueness is not required, so even if you are warned of a duplicate ID # value, the program will let you proceed to save the edited record, with the duplicate ID # value.
· Warn on illegal numeric or date field data – Normally, during data entry or editing, Recollector allows you to enter any kind of data into any data field. If you would like the program to provide a little bit of checking, you can turn on this check box. If this choice is selected, the program will not let you exit a data-entry/editing screen if any of the numeric data fields (currency, dimension or number fields) contain non-numeric data or any of the date fields contain non-date data. Be advised, though, that Recollector’s rules for what is an allowable number or date are very lenient: “$123.45 or more” is treated as a valid number (because part of the text can be extracted and interpreted as a number) and “99-XYZ-2005” is treated as a valid date (because part of the text, 2005, can be interpreted as a year). Only values that cannot possibly be interpreted as numbers or dates will be flagged.
· Spell check (one-line and multi-line text fields) – If spell checking is turned on, one-line and multi-line text fields will highlight possibly misspelled words with red underlining.
· Format for dates inserted by the calendar helper – Next to each date-type field in the data-entry/editing window is a calendar button. Clicking on the button brings up a calendar that can be used to choose a particular date. When the date is chosen, the selected date is inserted into the date field’s text-entry box. This preference determines how the date is formatted as text. Choose the desired formatting style from the dropdown list. The dropdown list shows an example date (July 4, 1976) displayed in a variety of formats. Note that some of the date formats use the European-style convention of day preceding month (e.g. “04/07/76”), while others use the American-style convention of month preceding day (e.g. “07/04/76”). (See the next paragraph for another preference related to American vs. European date formats.)
· Interpretation of numeric dates – This choice lets you control how the program interprets dates that you enter with numeric month and day values (e.g. 10/11/2006). By default such dates are interpreted by the “American” convention of month-before-day. Choose European style to have the interpretation be day-before-month. The only effect of this choice is on sorting: When sorting is by a date column, the program tries to convert the text value in the date field into a valid date, and then does chronological sorting. The results of sorting can differ, depending upon whether numeric dates are being interpreted by American or European conventions. For example, 10/11/2006 is earlier than 11/10/2006 by American sorting, but 10/11/2006 is later than 11/10/2006 by European sorting.
· Decimal symbol interpretation – This choice lets you choose between the two common styles of displaying numbers (including currency and dimension values): (1) With a period (.) as the decimal separator and comma (,) as the grouping separator for groups of three digits; or, (2) With a comma (,) as the decimal separator and a period (.) as the grouping separator for groups of three digits. This preference is intended primarily to ensure correct sorting of numeric values that contain periods and/or commas as either decimal or grouping separators. This preference also affects the display of currency information in the Summary window and the Item Details display of currency field values.
· Height (in lines) of long-text data-entry boxes – For multi-line text fields, the data-entry/editing window normally provides text-entry boxes that are 5 lines high. (The boxes are scrollable, so you can always access and edit longer text, but the visible portion shows 5 lines by default.) If you prefer boxes that display fewer or more lines, you can select a number here (between 2 and 20).
·
Two-line
height text box for image fields – The text-entry field for image fields is
normally one line high. If you have many images, or long full pathnames for
images, you might find one line inadequate to view all the text in the image
field at one time. If you turn on this preference, image fields will be shown
in the editor with text boxes that are two lines high.
· Compact layout for wide entry/editing windows – Normally, Recollector lays out the fields in the data entry/editing window from top to bottom (though it will sometimes position two short text fields side-by-side, to conserve a bit of space). This is not the most efficient use of screen space, and if your collection has a large number of fields, you may find that not all the fields fit in the edit/editing window without scrolling up or down. An alternative compact layout strategy is available that is considerably more efficient in its use of screen space, such that with most collections you can display all of the fields at once, with no need to scroll. The program only switches to compact layout mode when two conditions are met:
1. The data entry/editing window is sufficiently wide. The threshold is 1000 device independent pixels (or slightly over 10”). Expanding the window to be near full-screen width (or maximizing the data entry/editing window to full-screen size) will, on most displays, cause this threshold to be met. If you resize the data entry/editing window larger or smaller, crossing this threshold width, the window will automatically switch between its normal layout strategy (for narrower windows) and the compact layout strategy (for wider windows).
2. The compact layout preference check box must be set on this tab of the Preferences dialog. If the check box is not set (by default it is not set), the normal layout strategy will be used in all cases.
Note concerning normal vs. compact layout: With normal layout, fields are laid out, top-to-bottom, according to the Item Details field order. With compact layout, fields whose data type uses wide text-entry boxes (one-line text, multi-line text, and image fields) are laid out on the left side of the data entry/editing window, and fields that use short text-entry boxes (short text, number, date, currency, dimension) are laid out on the right side. Within each of these two sections, fields are laid out according to the Item Details field order. If the total height of the laid out fields on the left side is longer than that of the fields on the right (or vice versa), fields will be shifted right (or left) to approximately equalize the height of the two sides, thereby minimizing the overall space used and helping to make all fields visible at once.
· Auto-generate ID # when adding records – The ID # field in the data-entry window is accompanied by a button (labeled Assign next ‘ID #’ value) whenever the other records in the collection contain numeric values. This button can be used to assign the next sequential numeric value and put it into the ID # field. If you turn on this preference, then the assignment will happen automatically when you ask to add a new record.
Item Details
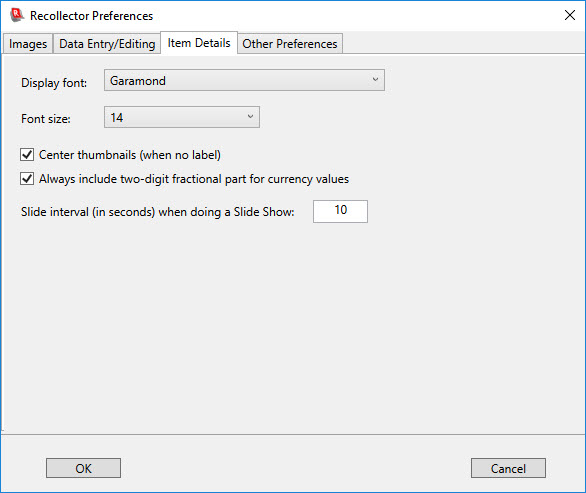
The Item Details tab lets you control several aspects of the way data is displayed or printed for the Item Details view:
· Display font - The font used when displaying or printing Item Details is normally Times New Roman. However, if you prefer a different font, you can select one from the drop-down list.
· Font size – The Item Details view is normally displayed using the font size corresponding to the Small, Medium, and Large font-size choices found on the Options menu. But you can explicitly set a different font size for the Item Details display.
· Center thumbnails – If you have image fields for which the field label is suppressed (see description of suppression, further on in this paragraph), then you may find it visually more appealing to have your thumbnail image(s) centered on the screen (or printout page), rather than aligned at the left-hand edge. Turn on this check box to request that thumbnail images be centered. Note that this centering will only be applied to fields whose field label is suppressed, and that suppression of field labels in the Item Details display is accomplished by changing the field name to a name enclosed in parentheses, for example: “(Images)”. (See the section titled Adding a Field in the section of the User’s Guide on Modifying a Collection’s Fields for a fuller description of the effects of parenthesizing the name of an image/audio/video field.)
· Always include two-digit fractional part for currency values – Normally whole-number currency values are displayed without a decimal point or fractional digits. You can use this preference to turn on the display of “.00” as part of all whole-number currency values. When your collection contains currency data with fractional components for some values (for example: 20.75), you may prefer to always display the two-digit fractional part for all currency values, even when the value is a whole number (for example, 150.00). That is the purpose of this preference. Note: This preference also affects the display of currency values in the List view and the Image Gallery view. It also affects the display of currency values in printed reports and in generated web site pages.
· Slide show interval – The Options menu of the collection window contains a Start Slide Show choice (available only when displaying Item Details). If this is selected, then the current Item Details is displayed for an interval, and then the display automatically moves to the next record. The preference specified here determines the length of time, in seconds, that each record’s Item Details is displayed before switching to the next record. By default this interval is 10 seconds. Any value between 1 second and 300 seconds (5 minutes) is allowed.
Note: Several
other aspects of the Item Details display are controlled from the menus and
from other dialogs:
· The order of displayed fields is controlled from the dialog invoked by the Item Details: Field Order choice on the Options menu.
· Normally the Item Details view shows all fields that contain data. But you can limit the Item Details display (or printout) to just those fields that are currently included in the List view. Selecting Limit Item Details to Only Fields Shown in List on the Options menu does this. Note that the order of the fields shown in the Item Details display will also be the same as that shown in the List view if you select this option. This allows you to create a completely custom Item Details display (choice of items and their order) by creating a field profile (see Creating and using Field Profiles for details on how to do this) that has just the fields you want to see, in the order you want to see them. Then switch the List view to use this profile (using Set Field Selection from Profile on the Options menu) and turn the Limit Item Details to Only Fields Shown in List toggle on. Now, when you switch to the Item Details display, you will see the custom field selection/order that you desire.
Other
Preferences
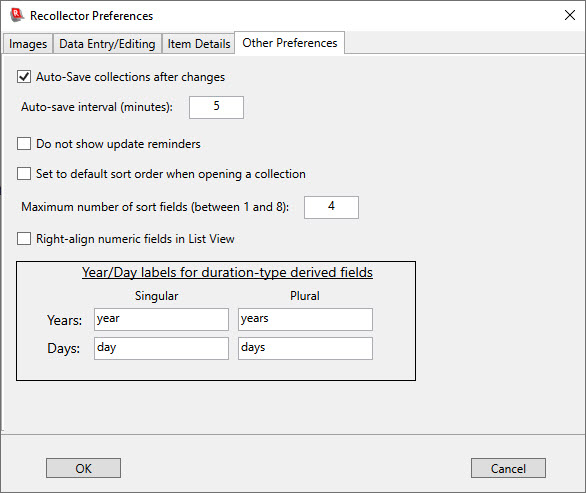
The Other Preferences tab lets you control several other aspects of the program:
·
Auto-save
– Allows changes to be automatically saved after a specified interval. Normally, auto-save is enabled. If auto-save
is enabled, the program will check every time the specified interval has
elapsed, and if any changes have been made to your collection, the collection
will be saved to disk, just as if you had chosen Save from the File
menu. (Auto-save will not write the
collection back to the disk if nothing has been changed.)
Note: When auto-save is not enabled, and your collection has unsaved
changes, you will be prompted whether to save those changes when you exit the
program. If auto-save is enabled, then
any unsaved changes will automatically be saved, without prompting. If you find
the prompts annoying, but don’t actually want auto-save, you can achieve this
effect by enabling auto-save, setting the auto-save interval to a very large
value (for example, 10000 minutes). This way no timer-based saving will occur,
but, when you exit the application, any unsaved changes will be saved, without
any additional prompting.
· Do not show update reminders – When you start up Recollector, the program decides whether to notify you that a newer version of the software is available. It will do this when the version you are running is not the latest version. (Recollector does not want to badger you to upgrade, so if you decline to upgrade, the program will not remind you again for at least a week.) Nevertheless, if you find these weekly reminders annoying, you can turn them off completely, by turning on the Do not show update reminders preference.
Note: Recollector needs to access the internet to determine the version number of the latest available version of the software. Therefore, if you are running Recollector but your computer does not have internet access, the update notification will not be shown, regardless of the version you are running.
· Set to default sort order when opening a collection – Normally, when you open a collection, its sort order is set to whatever the sort order had been when you last closed the collection (either by explicitly closing the collection or by exiting Recollector). This is true even if the collection has a default sort order defined. However, with this preference turned on, Recollector will always set a collection’s sort order to its default sort order when the collection is opened. This preference has no effect on collections that do not have a default sort order defined.
· Maximum number of sort fields – Recollector lets you sort your data records by more than one sort field. Records are sorted initially by the first sort field. If multiple records have the same value for the first sort field, then they will be ordered, within that group of records, by the value of the second sort field (assuming a second sort field has been defined). And, similarly, if a group of records all share the same value for the first sort field, and also share the same value for the second sort field, this group of records will be additionally ordered by the value of the third sort field. And so on. With this preference, you can specify the maximum number of sort fields that can be used, between 1 and 8. The default is 4.
· Right-align numeric fields in List View – In the List View, the value shown in every field is normally left-aligned. However, this preference lets you specify that the contents of numeric fields (which includes fields whose type is ‘currency’, ‘number’ or ‘dimension’) should be displayed right aligned.
· Year/Day labels for duration-type derived fields – If you define a derived field whose formula produces a duration value, the labels for years and days can be specified through this preference. This would be useful, for example, for collections being created using a language other than English. The default, English, values for these labels are as shown in the illustration, above.
Back to: Recollector - Home Page